 Κυπριακό Κέντρο Περιβαλλοντικής Έρευνας & Εκπαίδευσης – Κυκπεε
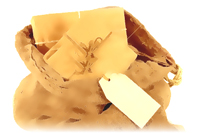
1) Mail Bag Craft
 Materials needed:
– Paper Bag
– Paper
– Crayons, Markers, or Paint
– Stapler or Tape
– Scissors
Time required:
20 minutes
Fold down the top edge of the paper bag about two inches. Then fold it down again. You can continue to fold down the top of the bag until your mail bag has the height you desire.
Next, fold the strip in half so you have one long strip that is 2.5-inches wide and double thick. Staple the ends of this strip onto the top, inside edge of your bag to make the strap. Make sure the straps are on the side of the bag directly across from each other.
You can also decorate your mail bag as you want (drawing or painting a mail logo would be a nice idea). Your Mail Bag Craft is ready.
2) Paper Apron Craft
Materials needed:
– Paper Grocery Bags or Butcher Paper
– String or Yarn
– Crayons, Markers, or Paint
– Scissors
– Hole Puncher
Time required:
20 minutes
Instructions: To make a paper apron, start out by cutting an apron shape out of a paper (we suggest grocery bag or butcher paper). You will want to make it big enough for the lower part to wrap about your waist at least 2/3rds of the way. The top section should just cover your chest.

Draw four small dots on the corners of the apron as shown by the black dots in the picture. Use a hole puncher to punch a hole where each dot is.
Cut four pieces of string that are long enough to tie around your neck and around your waist. Tie one end of each piece of string to each of the holes you punched. Decorate your apron as you desire using markers or paint.
Your apron is ready. Enjoy!
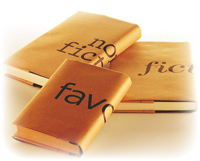
3) Paper Bag Book Cover
 Materials:
– Paper Grocery Bags or Butcher Paper
– Cellophane Tape
– Crayons, Markers, or Paint
– Scissors
– Notebook or Book
Time required:
20 minutes
Instructions: Take apart the brown paper bag to make one large sheet of brown paper. Do this by cutting down the side of the bag and cutting the bottom off.
Open your book and set it on the center of the paper bag. Fold up the top edge of the paper bag and crease it then fold up the bottom edge of the paper bag and crease it. Now, remove the book and fold in both of the creased edges of the paper. Set the open book back on top of the paper bag. Trim the ends of the paper bag so they are about 3- 4 inches longer than the edge of the book.
Fold one of the cut edges of the paper bag over the cover of the book so it fits snuggly along the edge. Tape the paper bag together. Make sure the tape only attaches to the paper bag and not the book.
Once you have finished assembling your paper bag book cover you should take a few minutes to personalize it! You can decorate it as you like using crayons, markers, or paint.
The Paper Bag Book Cover is ready!


